
How to Remove an Ostomy Bag Without Pain or Skin Damage
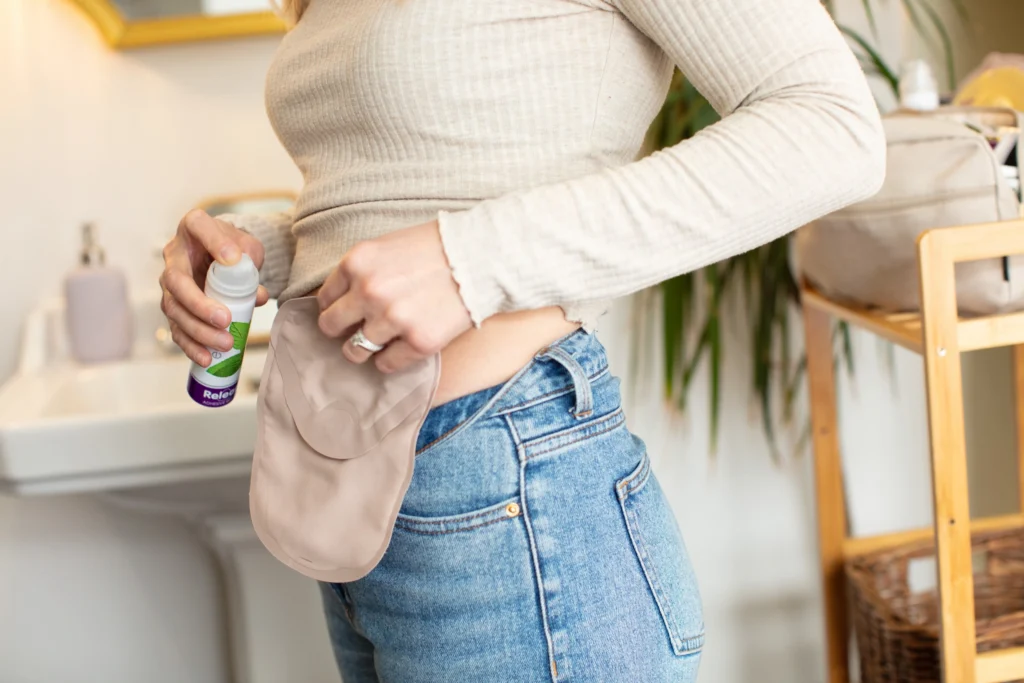
Changing an ostomy bag can feel intimidating. This is especially true in the weeks after surgery when it is new to you. Many people worry that removing the barrier will hurt or leave the skin sore. That concern is completely understandable. With the right technique, appliance changes often become much more comfortable. One of the most common reasons for peristomal skin problems is removing the bag too quickly or using too much force. Fortunately, this is something that can usually be avoided by following a gentle and consistent routine. This guide explains how to remove an ostomy bag step by step while protecting the skin around the stoma. The goal is to make each pouch change as comfortable as possible and help keep the skin healthy over the long term. Why Removing an Ostomy Bag Can Hurt or Damage Skin An ostomy barrier is designed to remain securely attached throughout the day, even during normal movement, showering, and exercise. That strong seal is essential for preventing leaks. It also means the adhesive needs to be removed carefully. If the barrier is pulled directly away from the skin, it can lift the outer layers of skin along with it due to the strong adherence to the skin. This repeated trauma is one of the most common causes of sore peristomal skin. It may appear as redness, tenderness, skin stripping, small areas of weeping, or other forms of Medical Adhesive-Related Skin Injury (MARSI). These problems are more likely to develop if pouch changes are frequent or the barrier has become firmly attached after several days of wear. A study from McNichol et al. discusses injury related to medical adhesive usage and the prevention of injury and discomfort. Many people assume that discomfort is unavoidable, but that usually isn’t the case. The solution is not normally a stronger pull or a quicker removal. Instead, it comes down to using the correct technique. Supporting the skin, allowing the adhesive to release gradually, and avoiding sudden movements place far less stress on the skin and make appliance removal noticeably more comfortable. This article concentrates on those practical techniques. Read our companion guide How to Remove Medical Adhesive from Skin Safely if you’d like to learn more about MARSI and adhesive-related skin damage. We even cover the science behind gentle adhesive removal. The Golden Rule — Push the Skin, Don’t Pull the Bag There is one technique that makes the biggest difference during an ostomy bag change: push the skin away from the barrier instead of pulling the bag away from the skin. This is in line with the official advice from the United Ostomy Associations of America. This relatively small change greatly reduces the amount of force placed on the skin. Rather than letting the adhesive pull at the skin as it releases, you’re helping the skin separate from the barrier gradually. Many stoma nurses teach this method because it is much gentler than simply peeling the appliance away. Start by loosening one corner of the barrier. Hold that edge lightly while using the fingers of your other hand to push the surrounding skin inward and away from the adhesive. Keep the skin supported and slightly taut as you continue. The barrier should peel away slowly rather than lifting off in one movement. Work a small section at a time instead of trying to remove the whole barrier at once. If you feel resistance, pause rather than pulling harder. Supporting the skin throughout the process can reduce stretching and unnecessary pain or trauma to the area. The temptation is often to finish the job quickly if the barrier feels firmly attached. People think of it like ‘pulling off a band aid’ but this is not an accurate comparison. Slowing down usually makes removal easier and leaves the skin in much better condition for the next pouch. A gentle and controlled removal takes a little longer. It can make every appliance change more comfortable. Step-by-Step: Removing Your Ostomy Bag Painlessly Following the same routine every time helps make pouch changes more comfortable and reduces the chance of skin irritation. Resist the urge to pull quickly or force the barrier away from the skin. A slow and steady approach almost always results in a more comfortable pouch change and healthier peristomal skin over time. When to Use an Adhesive Remover Many pouch changes can be completed using good technique alone. There are also times when an adhesive remover makes the process much more comfortable. The goal isn’t to use one every time because you have to. It is to reduce unnecessary pulling when the barrier is difficult to remove. An adhesive remover is particularly helpful when the barrier feels firmly attached. This could be because it has only been worn for a short time, or the skin around the stoma is already sore or tender. Apply the remover around the lifted edge of the barrier and allow it a few seconds to loosen the adhesive before continuing. For routine ostomy care, our alcohol-free, no-sting adhesive remover spray is often the gentlest option even when adhesion is strong. It can be applied evenly beneath the edge of the barrier as it is peeled back, helping the adhesive release with less force. A residue-free formula is also important because leftover adhesive or oily films may affect how well the next barrier seals to the skin. Avoid using household oils or other home remedies to loosen the barrier. They can leave residue behind and interfere with the next appliance. Only use products that are approved for medical use. Alcohol-based removers can also be a more robust option for stubborn adhesives. If you’re unsure which type of remover is most appropriate for your skin or appliance, see our companion guide on Adhesive Remover Spray for Ostomy Bags. This compares the available options in more detail. Caring for Peristomal Skin After Removal Once the old appliance has been removed, take a few moments to check the skin before applying a new
Traveling with an Ostomy — How to Manage Odor Confidently

Traveling with an ostomy is something thousands of people do every day. Travel itineraries may include weekends away or business trips. Full vacations can also be enjoyed while managing an ostomy. Having a stoma does not have to limit where you go. The biggest concern is often not the journey itself. It’s the worry that an odor issue or unexpected leak might happen in a public place. This could happen on a plane or even while sharing accommodation with others. Those concerns are completely understandable. Odor management on the road usually comes down to preparation and routine. A few simple habits and the correct products can help make ostomy care feel much more predictable wherever you are. If you’d like to learn more about what causes ostomy odor or how to control it day to day, see our guide on How to Control & Eliminate Ostomy Bag Odor. This guide focuses specifically on staying fresh and confident while traveling. Build a Travel Odor Kit Before You Leave A lot of confidence comes from knowing you’re prepared for the unexpected. The best time to solve a problem is before the trip starts. Most ostomy organizations recommend carrying more supplies than you expect to need. A common rule is to pack at least double your usual amount and split supplies between your carry-on and checked luggage. A delayed bag does not leave you without essential items if you have what you need in carry-on. For odor control, a travel kit should include: Keep enough supplies in your carry-on to cover the entire travel day plus any unexpected delays. Flights are delayed sometimes. Plans can change. Having everything within reach removes a lot of unnecessary stress. Think of the kit as a confidence tool rather than an emergency kit. Knowing they are available makes it easier to relax and enjoy the journey (even if you never need them). Why Travel-Size Deodorant Packets Win Travel-size deodorant packets are one of the simplest ways to manage odor away from home. Single-use options such as Assure C Odor Eliminator are pre-portioned, lightweight, and easy to carry in a pocket, handbag, or carry-on. There is nothing to leak or spill in luggage as there may be with bottles. They also take up very little space and can be used discreetly wherever pouch care is needed. Using a packet after each pouch emptying helps maintain a consistent odor-control routine throughout the trip. That predictability can be just as valuable as the deodorizing effect itself. Get Through Security Calmly and Discreetly For many people, the most stressful part of traveling with an ostomy is not the flight itself. It is getting through airport security and worrying about unwanted attention. One helpful option is the UOAA Travel Communication Card. This is a simple card that can be shown to a TSA officer to discreetly explain that you have an ostomy. It does not allow passengers to skip screening, but it can make conversations easier and reduce the need to explain personal medical information in a busy checkpoint. This is especially useful if you are in a position where there could be a language barrier. Travelers can also contact TSA Cares at least 72 hours before departure by calling (855) 787-2227. The program can arrange assistance from a Passenger Support Specialist and answer questions about traveling with medical supplies. It may also be possible to request a private screening and have a companion present. TSA guidance states that travelers should not be required to expose their ostomy pouch during the screening process. Bringing Deodorant and Medical Liquids Through TSA Many travelers worry about carrying ostomy supplies through security. Medically necessary liquids and gels are permitted in carry-on baggage (even when they exceed the standard limits). Simply inform the TSA officer during screening. Travel-sized odor-control products make things even easier. Single-use deodorant packets such as Assure C take up very little space and fit neatly into a carry-on or pocket. Having them readily available means odor control can simply become part of your normal routine from departure to arrival. This level of convenience is something that so many patients value. Managing Odor and Gas on the Plane (or in the Car) A little preparation before departure can make travel feel much more predictable. One of the simplest habits is to empty your pouch and add deodorant shortly before boarding a flight or starting a long drive. Beginning the journey with a freshly emptied pouch reduces the likelihood of needing an urgent stop soon after departure. Air travel introduces another factor: cabin pressure. Changes in altitude can increase gas production inside the pouch. This can cause a phenomenon called ballooning. If your pouch includes a charcoal filter, make sure it is functioning properly before travelling. Some people also find it helpful to be cautious with carbonated drinks and foods that can commonly increase gas before flying. You may already know what triggers gas or makes it worse. Always follow the same odor-control routine you use at home if you can. Adding a deodorant packet after each emptying helps maintain consistency throughout the trip and can make public restrooms feel less stressful. It’s also worth carrying a few odor-lock disposal bags in your travel kit. They take up very little space and provide an extra layer of confidence when disposing of used supplies away from home. New Foods & Hydration While Traveling Travel often means different meal times and unfamiliar foods. Everybody experiences this when they are on the road. There may also be a temptation to try things that are not part of your normal routine. You don’t have to forgo that enjoyment. But do keep in mind that introducing large amounts of new foods before a flight or long journey may increase gas or odor unexpectedly. Staying hydrated and making gradual changes tends to be the safer approach before long travel days. For a detailed guide to foods and drinks that may affect pouch odor, see our article on How Diet
Best Adhesive Remover for Surgical Tape
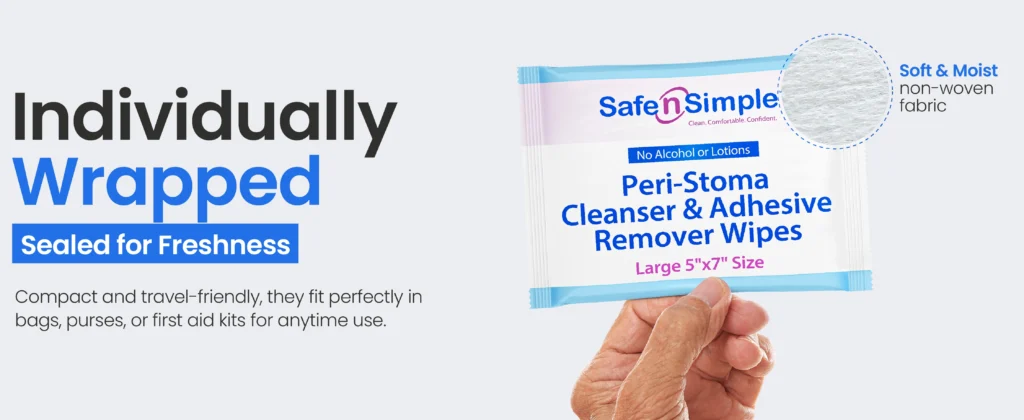
Surgical tape is designed to stay securely in place. It often does so using strong acrylate adhesives. That strength helps protect dressings and medical devices, but it can also make removal uncomfortable if the tape is pulled away too quickly or without the right product. Improper removal can lead to Medical Adhesive-Related Skin Injury (MARSI), including redness, skin stripping, blisters, and tears. Choosing the right adhesive remover helps dissolve the adhesive bond so tape can be removed more comfortably while protecting the skin. This guide compares the best types of adhesive removers for surgical tape and explains which option is most suitable for different situations. We’ve also provided a full guide on How to Remove Medical Adhesive from Skin Safely. Why Surgical Tape Needs a Proper Remover Modern surgical tapes are designed to create a reliable bond with the skin. This is why simply pulling them off can damage the outer skin layers. Repeated tape removal is a well-recognized cause of MARSI. This can be a particular risk in people with fragile or sensitive skin. A medical adhesive remover works by loosening the adhesive so the tape releases with much less force. This helps reduce discomfort and lowers the risk of skin trauma during dressing changes. Another advantage is cleaner removal. Adhesive residue left on the skin can make future dressings harder to apply and may trap dirt or microorganisms. A purpose-made adhesive remover leaves the skin cleaner and ready for the next dressing or tape application. A 2013 study by McNichol et al. called “Medical adhesives and patient safety: state of the science: consensus statements for the assessment, prevention, and treatment of adhesive-related skin injuries” explains that “Little guidance exists in the literature regarding appropriate selection and proper use of adhesive products to minimize medical adhesive-related skin injury.” We believe that this knowledge is important for patients and improving their outcomes. Types of Medical Adhesive Removers for Tape Not all medical adhesive removers work in the same way. The right choice depends on the type of surgical tape and the condition of your skin. A gentle and alcohol-free remover is often the best place to start. Alcohol-Free Adhesive Remover Alcohol-free removers are often a good choice for routine surgical tape removal. They loosen the adhesive without causing unnecessary irritation and are suitable for frequent dressing changes and even damaged and fragile skin. Most modern formulations are no-sting and leave no oily residue. The skin is ready for a new dressing if needed. Safe n’ Simple Adhesive Remover Spray is a prime example. Its alcohol-free formula dissolves adhesive while remaining gentle on the skin. This makes it suitable for everyday use and larger taped areas. Silicone-Based Adhesive Removers Silicone-based adhesive removers are widely recommended in wound care because they release tape gently and help reduce the risk of skin damage. Some silicone medical tapes are designed to remove cleanly with minimal discomfort and often do not require an adhesive remover at all. Silicone-based tapes and removers can be a good option for protecting vulnerable skin and for repeatedly changing dressings. Alcohol-Based Adhesive Removers Alcohol-based removers provide stronger dissolving power and are best reserved for stubborn adhesive residue or long-wear surgical tapes. They work quickly but may sting and dry the skin. This is more of an issue if it is already irritated or fragile. For these situations, Safe n’ Simple Adhesive Remover Wipes with Alcohol offer a practical solution. They are intended for heavier adhesive buildup and should be rinsed from the skin after use. Applying a moisturizer afterward may also help reduce dryness. They should not be used on broken or raw skin. The best adhesive remover is one that removes tape comfortably, leaves little or no residue, and matches both the condition of the skin and the strength of the adhesive. Spray or Wipes for Tape? Both formats are effective depending on the scenario. Sprays work well for larger dressings and hard-to-reach areas, while wipes are convenient for smaller sites and travel. See our guide to Adhesive Remover Spray vs Wipes for a full comparison. What to Look For in a Remover for Tape When choosing a medical adhesive remover, look for products that offer: Alcohol-based removers remain a useful option when dealing with particularly stubborn surgical tape. They are generally best kept for occasional use rather than everyday dressing changes. Safe n’ Simple Adhesive Remover Spray (Alcohol-Free) — Best for Most Tape sns-medical.com/product/adhesive-remover-spray/ For routine surgical tape removal, an alcohol-free spray is the best choice for most people. Safe n’ Simple Adhesive Remover Spray is formulated to dissolve the adhesive bond so tape can be removed with less force. This makes a big difference in reducing discomfort and protecting the skin. The no-sting formula is well suited to sensitive or post-operative skin. It also leaves no oily residue, so a new dressing or tape can be applied straight away. The spray format provides even coverage across larger taped areas and awkward locations that can be difficult to reach with a wipe. The product carries HCPCS code A4455. It may be covered by insurance where applicable. Safe n’ Simple Adhesive Remover Wipes with Alcohol — For Stubborn Tape sns-medical.com/product/adhesive-remover-wipes-with-alcohol/ Some surgical tapes leave behind heavy adhesive that gentle removers cannot fully dissolve. Safe n’ Simple Adhesive Remover Wipes with Alcohol provide a stronger option. The alcohol-based formula is designed for stubborn adhesive buildup and long-wear surgical tape. Each wipe is individually packaged, making it easy to keep a few on hand at home or while travelling. These wipes are best reserved for occasional use so that the skin does not dry out. This can also be avoided by rinsing the skin and applying a moisturizer if needed. They are not recommended for broken or irritated skin. Safe n’ Simple Peri-Stoma Cleanser & Adhesive Remover Wipes (Alcohol-Free) — Gentle Wipe sns-medical.com/product/adhesive-remover-wipes-without-alcohol/ Safe n’ Simple Peri-Stoma Cleanser & Adhesive Remover Wipes provide a gentle alcohol-free alternative for those who still want to use wipes. They remove adhesive while also
Barrier Ring vs Ostomy Paste — Which Is Better?
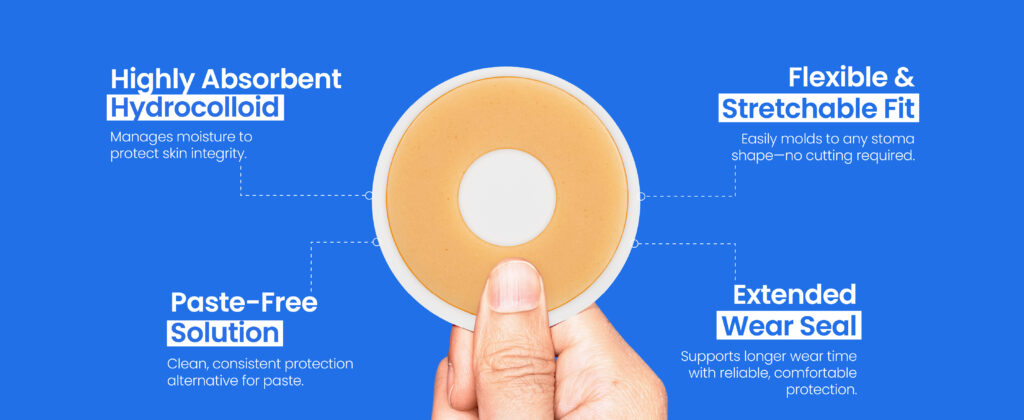
Some ostomy products can be overwhelming. Each user needs to understand what works best for their own unique needs. When comparing a barrier ring vs paste for stomas, the main difference is how each creates a seal. A barrier ring works like a moldable gasket around the base of the stoma. This makes it the first-line choice for most people who need additional protection against leaks. Ostomy paste is more like caulk. It fills specific small gaps, scars, folds, or uneven areas that could otherwise compromise the seal. The two products therefore aren’t direct substitutes in every situation. A barrier ring can provide the main seal and paste can supplement it where extra filling is required. Some ostomates only need a ring. Others may benefit from using both. This guide compares ostomy paste vs barrier rings. You’ll see how they work plus their practical differences and when combining them makes sense. What Is a Barrier Ring? A barrier ring is a soft, moldable hydrocolloid seal placed around the base of the stoma beneath the wafer. It conforms to gaps and uneven contours while absorbing moisture to help maintain the seal. See What Is an Ostomy Barrier Ring? for a complete explanation of how barrier rings work. What Is Ostomy Paste? Ostomy paste is a caulking material used to fill scars, folds, dips, and other irregularities beneath the skin barrier. Both alcohol and alcohol-free formulations are available. Remember that products containing alcohol may sting if applied to sore or broken skin. Depending on formulation, ostomy paste may fall under HCPCS A4405 or A4406. Barrier Ring vs Paste — Key Differences The main difference between a barrier ring and paste is the type of seal each creates. A barrier ring provides a continuous and gasket-like seal around the stoma. Paste is a targeted filler used to close smaller gaps and irregularities. This is why a ring will generally be the first option when an ostomate needs additional support beneath the wafer, with paste added when necessary. There are practical differences too. A moldable barrier ring can be stretched and shaped around the stoma without cutting. Safe n’ Simple Conforming Skin Barrier Rings are also designed to absorb moisture and remove without leaving residue behind. Paste is squeezed from a tube and applied only where filling is needed. It can be stickier and may require more cleaning at appliance changes. Another consideration is sensitive or sore skin. Barrier rings do not contain alcohol and should not cause the stinging associated with alcohol-based pastes. Alcohol-free ostomy paste is ideal for people who need the gap-filling properties of paste without alcohol. The comparison below shows why stoma paste vs ring isn’t simply a question of which product is better. They perform different jobs and (crucially) can complement one another. Feature Barrier ring Ostomy paste Mechanism Gasket-like continuous seal Caulk-like targeted filler Application mold and stretch Squeeze and spread where required Mess and residue Clean handling; options designed for residue-free removal Stickier and may be harder to remove Potential for stinging Alcohol-free ring material Alcohol-containing paste may sting sore or broken skin Cutting No cutting required with moldable rings Not applicable Absorbency Absorbs moisture around the stoma Primarily used to fill irregularities Best for Creating the main seal and accommodating contours Filling specific scars, folds, dips and micro-gaps When to Use a Barrier Ring For most ostomates who need extra support beneath their wafer, a barrier ring is a good place to start. Its biggest advantage is that it creates a continuous seal rather than addressing individual gaps one at a time. The ring can be moulded closely around the stoma and shaped to accommodate the variations in the skin. This can be particularly useful where the skin surface isn’t completely even. Safe n’ Simple Conforming Skin Barrier Rings are designed to stretch and mould into these spaces while absorbing moisture around the stoma. They can therefore provide the main seal without requiring paste or a more complicated combination of products. Their residue-free removal can also make appliance changes cleaner. A ring may also be preferable for someone with sensitive skin who wants to avoid an alcohol-containing product close to the stoma. Different types of barrier rings can accommodate more specific requirements. This can include deeper contours or situations where greater resistance to erosion is desirable. There is also clinical evidence supporting the role of barrier rings in peristomal skin management. A multicentre study involving people with ileostomies found improvements in peristomal skin condition while using a moldable barrier ring, alongside high levels of participant satisfaction. This doesn’t mean everybody with an ostomy automatically needs a ring. However, when the choice is simply barrier ring or paste for creating the primary additional seal, the ring will generally be the more appropriate starting point. When to Use Ostomy Paste Ostomy paste becomes particularly useful when there is a specific area that needs filling. A scar running underneath the wafer may create a narrow channel that isn’t completely level even after a barrier ring has been moulded into position. Small dips and other irregularities can create similar problems. Paste can be applied to these targeted areas much like caulk is used to fill the small spaces around a household fitting. It isn’t intended to function as the main adhesive holding an ostomy appliance in place. Using more paste doesn’t necessarily create a better seal. Instead, its value comes from being able to fill relatively small spaces precisely. Paste is generally best viewed as a supplemental product rather than the automatic alternative to a barrier ring. If a ring already creates a close seal, adding paste everywhere is unlikely to be necessary. Where one or two stubborn micro-gaps remain then a small amount of paste can provide additional filling. Safe n’ Simple Skin Barrier Paste can be used alongside a barrier ring where targeted filling is required. A little goes a long way. Your aim is to fill the irregularity rather than create a thick additional layer underneath
How to Use an Ostomy Barrier Ring Correctly
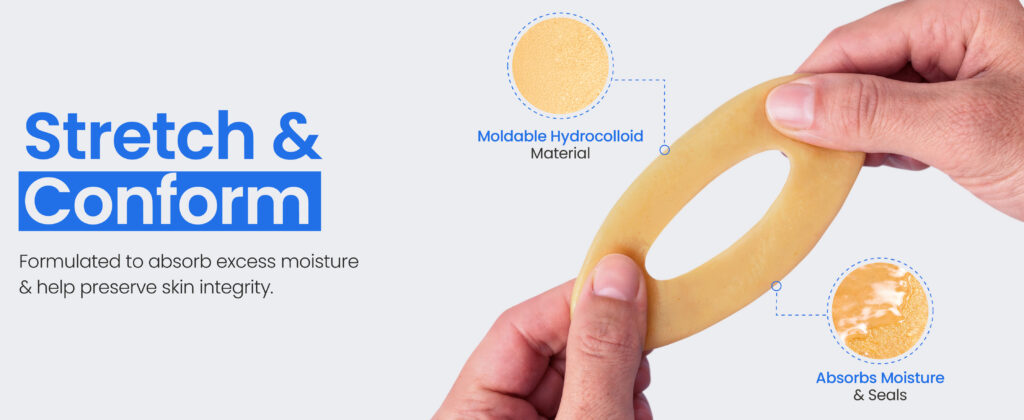
Applying an ostomy barrier ring can feel a little awkward at first. The process is fairly simple once the technique becomes part of daily routine. The important part is getting the small details right. Clean and dry skin helps. A correctly moulded ring and firm contact between the ring and pouching system can also contribute to a more reliable seal. This guide explains how to use an ostomy barrier ring step by step. This means each step from preparing the skin to molding the ring and applying the wafer. It also covers common application mistakes and some simple ways to help the finished seal last. Safe n’ Simple Conforming Skin Barrier Rings are designed to be molded and stretched rather than cut. This allows the ring to follow the individual shape of the stoma and surrounding skin. The focus here is specifically on applying them correctly. For more information about what rings do and why they are used, read our guide on What Is an Ostomy Barrier Ring and How Does It Work? What You’ll Need It helps to have everything ready before removing the existing pouching system. This makes the change quicker and avoids having to search for supplies after the skin has already been cleaned. For a standard barrier-ring application, have the following to hand: The ring itself provides the main additional seal beneath the wafer for most people. Paste shouldn’t automatically be considered an essential part of every change. When it is required, it should have a specific gap or contour to fill rather than simply being added as another layer. Safe n’ Simple offers several Skin Barrier Ring options for different contours and wear requirements. The Conforming Skin Barrier Ring is the standard mouldable option and can be stretched to fit without cutting. Having the correct ring available before beginning makes the remaining steps much easier. Step 1 – Clean and Fully Dry the Skin Start with clean peristomal skin. After gently removing the old pouching system, clean the area around the stoma using plain warm water or an ostomy-specific cleanser. Avoid oily soaps and other products that can leave a residue on the skin. This can interfere with adhesion. There is usually no need to scrub. Gentle cleaning is preferable, particularly because the same area of skin is repeatedly covered by adhesive and exposed during pouch changes. Once clean, carefully pat the skin dry with a lint-free cloth or towel rather than rubbing it. The fully dry part of this step is particularly important. A barrier ring needs good contact with the skin. Any moisture left around the stoma can make it more difficult to establish a secure bond. Check around the entire stoma base rather than assuming the area is dry after a quick wipe. This is also a useful opportunity to look at the peristomal skin before covering it again. Healthy skin should generally look similar to the surrounding abdomen. Persistent redness, broken or weeping skin, significant soreness, or another noticeable change may warrant advice from an ostomy or WOC nurse. For more detail on maintaining healthy skin between pouch changes, see How to Protect the Skin Around Your Stoma. Step 2 – Choose and Size the Ring Choose a barrier ring that is reasonably close to the size of the stoma. The opening doesn’t need to be an exact match straight from the package because moldable rings are designed to be adjusted by hand. Safe n’ Simple Conforming Skin Barrier Rings can be gently stretched to create a wider central opening. There is no need to cut the ring to size. Stretching rather than cutting helps preserve a continuous ring of material around the stoma. The aim is to create an opening that sits closely around the stoma without covering or constricting it. A large gap between the stoma and ring can leave skin exposed to output, while forcing an opening that is too small can interfere with the fit. Stoma size and shape can change, particularly during the weeks following surgery. Don’t assume that the size used previously will always remain correct. Measuring periodically can help confirm that the ring and wafer still match the current stoma. Larger or unusually shaped areas may require more material than one standard ring provides. Moldable rings can be combined or stacked where appropriate. This allows additional material to be shaped into the required area. Safe n’ Simple also offers different Skin Barrier Rings for varying contours and sealing requirements. Step 3 – Warm and Mold the Ring Hold the barrier ring between clean hands for a short time before applying it. Warmth makes the hydrocolloid material easier to mold. This allows it to conform more closely to the shape of the stoma and surrounding skin. Next, gently stretch the central opening rather than compressing the ring. Work around it gradually so the opening remains even and follows the stoma’s shape. The finished ring should frame the stoma closely without leaving obvious gaps. There are two accepted ways to position a barrier ring. The first is to apply it directly to the skin around the stoma. This approach provides a clear view of the stoma base and can make it easier to mould material into creases or uneven contours before the wafer goes on. The ring can also be placed onto the back of the wafer first, positioning it around the wafer opening. The wafer and ring are then applied together. Some people find this method easier because the ring is already centred on the pouching system and there is less handling close to the stoma. Step 4 – Position and Apply the Wafer If the ring has been placed directly on the skin, check its position before applying the wafer. It should sit snugly around the base of the stoma while leaving the stoma itself unobstructed. Gently work the moldable material into any minor creases or uneven areas. Avoid repeatedly lifting and repositioning the ring once it has begun adhering to the skin.
What Is an Ostomy Barrier Ring and How Does It Work?
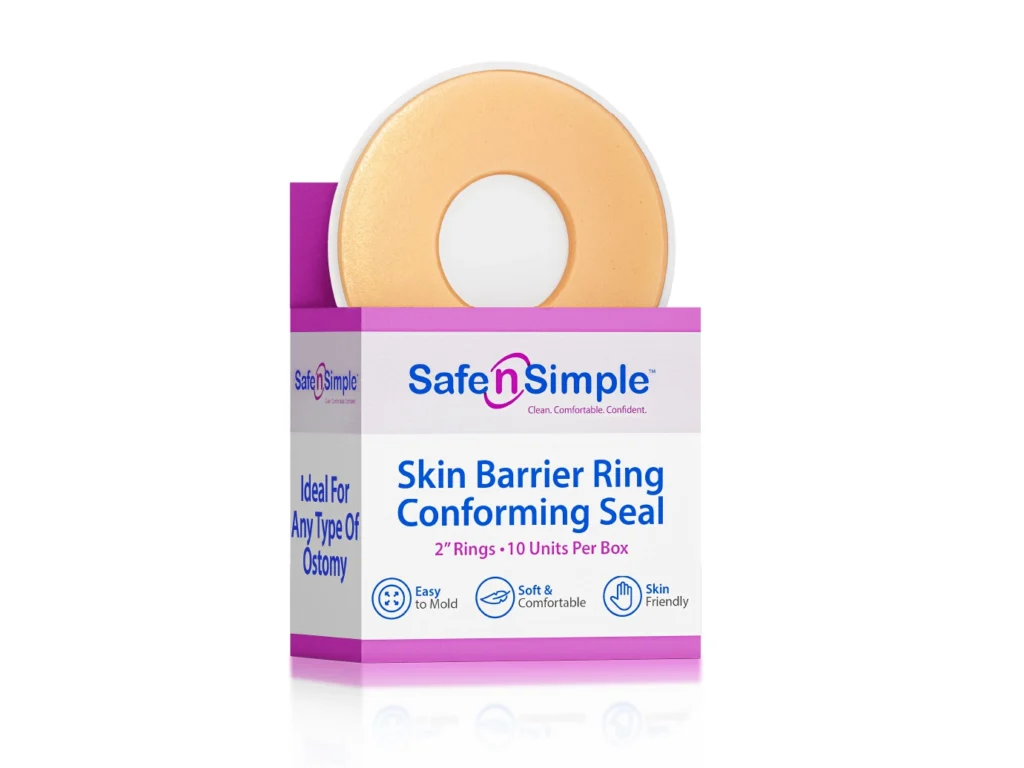
An ostomy barrier ring is a moldable hydrocolloid ring that sits around the base of the stoma. It sits underneath the wafer or skin barrier. The barrier ring creates a closer seal between the appliance and the skin and helps to close the small gaps and uneven areas where output could otherwise escape. Getting that seal right matters. 2021 research led by Richard R W Brady suggests that around 85% of people with an ostomy experience peristomal skin complications. Leakage and contact with stoma output are among the major concerns. Barrier rings provide an extra layer between the stoma and the pouching system. They can shape to the body while absorbing moisture around the stoma base. This guide explains what an ostomy barrier ring is and the different types available. For practical fitting instructions, see our How to Use an Ostomy Barrier Ring guide. Safe n’ Simple’s Skin Barrier Rings page also provides more information about the available ring options. What Is an Ostomy Barrier Ring? An ostomy barrier ring is a flexible seal placed directly around the base of the stoma before the wafer is applied. It is sometimes called a skin barrier ring, stoma ring, barrier seal, or ostomy seal, but these terms generally describe products designed for the same basic purpose of creating a closer fit between the pouching system and the body. Most barrier rings are made from soft and skin-friendly hydrocolloid materials such as pectin. The material can be stretched and molded to follow the shape of the stoma and surrounding skin. The wafer is then positioned over the top. It sandwiches the ring between the skin and the appliance. This extra layer is particularly useful because the surface around a stoma is rarely perfectly flat. The ring conforms to small creases and irregular contours and helps create a continuous seal while absorbing moisture around the stoma base. Barrier rings are classified as ostomy supplies for reimbursement purposes, although the applicable HCPCS code can vary by product and specification. For example, some barrier rings fall under A4385 or A4404, so the individual product listing should be checked rather than assuming one code applies to every ring. How Does a Barrier Ring Work? The easiest way to understand an ostomy barrier ring is to think of it as a sort of soft rubber gasket. It sits between the skin and the wafer and molds itself around the base of the stoma and into small creases or uneven areas. This creates a more continuous seal. Small gaps between the skin and wafer can provide a route for output to travel underneath the appliance. A moldable ring fills these spaces and forms a close-fitting barrier around the stoma. It helps to contain output where it belongs. Barrier rings also absorb moisture at the stoma base. This helps protect both the surrounding skin and the integrity of the seal, which can reduce leakage and support longer appliance wear. Clinical research has found improvements in peristomal skin condition among people using barrier rings. Importantly, a ring works as a gasket rather than caulk. Barrier paste serves the caulking role by filling individual folds, scars, or small imperfections. Our Barrier Ring vs Ostomy Paste guide explains this important distinction in more detail. What Is a Barrier Ring Made Of? Most skin barrier rings use soft hydrocolloid materials incorporating ingredients such as pectin. Hydrocolloids absorb moisture while remaining flexible enough to maintain close contact with the skin. Many modern rings are moldable and stretchable. They can be gently shaped around the stoma to create the required opening. This makes it easier to accommodate stomas and abdominal contours that are not perfectly round or even. Some formulations also contain skin-supporting ingredients. Certain Safe n’ Simple rings incorporate aloe and zinc oxide. This combines the physical seal provided by the hydrocolloid with ingredients intended to soothe and protect sensitive peristomal skin. A soft and absorbent material creates a flexible interface between the skin and the pouching system. Key Benefits of Using a Barrier Ring A barrier ring adds another layer of security beneath the wafer without making the pouching routine particularly complicated. Key benefits can include: Clinical studies of barrier rings have reported improvements in peristomal skin condition. The crucial study “Changes in Peristomal Skin Condition and User Experience of a Novel Ostomy Barrier Ring With Assisted Flow” shows better peristomal condition after using barrier rings. This evidence helps in supporting their role as more than simply an optional pouching accessory. Their main value comes from improving the interface between the body and the wafer. The skin surface can potentially make achieving a complete seal difficult. Who Should Use a Barrier Ring? Not every person with an ostomy will need a barrier ring. They can be particularly useful when achieving a reliable seal with the wafer alone is difficult. A ring may be worth considering for people with uneven skin around the stoma because its moldable material can conform to these contours. It can also provide additional protection for people experiencing recurrent leaks or whose peristomal skin is particularly sensitive to contact with output. People with high-output stomas may benefit from the additional moisture absorption and sealing support provided by a ring. A flush or retracted stoma can make it harder to direct output cleanly into the pouch. A barrier ring may form one part of the pouching setup. A convex appliance can also help some people with flush or retracted stomas by improving the relationship between the stoma and skin barrier. An ostomy nurse can help assess the stoma and suggest an appropriate setup if maintaining a secure seal remains difficult. Types of Safe n’ Simple Barrier Rings Barrier rings are available in different designs because not every stoma or body create the same sealing requirements. Within the Safe n’ Simple range, there are some simple and effective options. The goal isn’t necessarily to choose the most substantial ring. It is to match the type of seal to the stoma and output.
How to Remove Medical Adhesive from Skin Safely

Removing medical adhesive is part of daily care for many people using ostomy appliances or long-term medical devices. Poorly-implemented adhesive removal can damage the skin and increase the risk of pain or complications. This type of injury is known as Medical Adhesive-Related Skin Injury (MARSI). Consensus guidance published by McNichol et al. identified MARSI as a significant but often under-recognized issue in healthcare. Recent guidance notes that anyone requiring medical adhesive products may be at risk. Safe removal depends on two things working together: Safe n’ Simple’s adhesive remover range is designed specifically for this purpose. The line includes alcohol-free sprays, alcohol-free wipes, and stronger alcohol-based wipes so users can choose the most appropriate option. What Is MARSI and Why Safe Removal Matters MARSI refers to skin damage from adhesive or other causes that remains visible for 30 minutes or longer after adhesive removal. This can include: Mechanical skin stripping is the most common form and usually happens when adhesive is removed too quickly or without enough support for the skin. Some people face a much higher risk of injury, including: Research has shown MARSI can develop rapidly in vulnerable patients. This includes neonatal populations. The key point is that MARSI is often preventable. Proper removal technique and appropriate adhesive removers can significantly reduce trauma during dressing or appliance changes. The “Low and Slow” Technique — The Universal Rule Most wound care and ostomy guidelines recommend the same basic approach for a way to remove adhesive from skin safely: low and slow. The process is straightforward: Pulling upward places far more stress on the skin and increases the chance of stripping or tearing. Safe n’ Simple’s Adhesive Remover Spray without Alcohol works particularly well with this method as it can be sprayed continuously along the adhesive edge during removal. This allows gradual release rather than sudden pulling and supports more controlled appliance changes. Safe n’ Simple Adhesive Remover Spray — The Alcohol-Free Solution Alcohol-free spray removers are considered the gentlest option for routine removals. Safe n’ Simple’s Adhesive Remover Spray without Alcohol is designed for daily appliance and dressing changes where skin protection is important. Key features include: The spray is applied directly along the adhesive edge during the “low and slow” removal technique. The adhesive bond loosens and the appliance can be peeled away gradually. The skin is ready for a new barrier immediately after removal – no oily residues. Learn more at Safe n’ Simple Adhesive Remover Spray Safe n’ Simple Peri-Stoma Cleanser & Adhesive Remover Wipes (Alcohol-Free) Safe n’ Simple’s alcohol-free Peri-Stoma Cleanser & Adhesive Remover Wipes combine adhesive removal and skin cleansing in one step. Key features: The wipes can be used around the appliance edge during removal and then across the peri-stomal area to clear remaining residue and oil buildup before a new appliance is applied. They are particularly useful for travel and caregiver-assisted changes. Learn more at Safe n’ Simple Adhesive Remover Wipes Without Alcohol Safe n’ Simple Adhesive Remover Wipes with Alcohol — For Stubborn Adhesive Some adhesives require stronger removal power. This is often the case with hydrocolloid barriers or long-wear surgical tapes. Safe n’ Simple’s Adhesive Remover Wipes with Alcohol are designed for those heavier-duty situations. Key features: These wipes are intended for tougher buildup where alcohol-free removers may not fully dissolve the adhesive. They are generally better suited to intact skin rather than broken or fragile areas. Alcohol can potentially irritate skin. Learn more at Safe n’ Simple Adhesive Remover Wipes With Alcohol How to Choose the Right Safe n’ Simple Remover for Your Needs No two people are exactly the same in their needs. Different situations call for different remover types. All three formats are designed to support the same “low and slow” removal technique recommended in wound care guidance. Home Remedies and Alternative Methods We always have to be careful with alternative methods and follow medical advice. Household oils such as baby oil, mineral oil, coconut oil, or olive oil can loosen adhesive temporarily. Warm water soaking may also help with lighter bandages. However, these approaches have limitations: Purpose-made adhesive removers are formulated to dissolve adhesive while leaving the skin ready for reapplication. It is especially important for ostomy patients and people needing a safe way to remove adhesive residue from skin. Step-by-Step Guide Using Safe n’ Simple Products Gather supplies first and foremost. This includes adhesive remover, cloths, soap, and replacement barriers if needed. Pro tip: Keep an adhesive remover spray near your regular changing area and carry individual wipe packets for travel or unexpected appliance changes. Special Considerations for Vulnerable Skin Some patients face a much higher risk of skin injury during adhesive removal and benefit from gentler approaches. A reliable medical adhesive remover becomes even more crucial in this scenario. Safe n’ Simple’s alcohol-free spray and alcohol-free Peri-Stoma Cleanser & Adhesive Remover Wipes are designed for gentle routine removal on even the most sensitive skin. Preventing Skin Damage Before It Happens Preventing MARSI starts before the adhesive is removed. Helpful practices include: Wound care guidance consistently identifies proper removal technique as one of the most important ways to reduce avoidable skin damage. Safe n’ Simple also offers skin barrier products designed to help protect vulnerable skin during repeated appliance or dressing changes. When to Seek Medical Help Medical advice is important if skin damage does not improve or begins worsening. Always consult a professional if you have concerns. Seek help for: A WOC nurse or healthcare professional can assess the skin and recommend changes to removal technique or appliance fit.
Adhesive Remover Spray vs Wipes

The debate of adhesive remover spray vs wipes is one of the most common considerations among ostomy and wound care users. Both formats are designed to loosen adhesive and improve comfort during appliance or dressing removal, but they work differently and suit different situations. Discussion across ostomy communities regularly shows users comparing sprays and wipes based on a number of factors like skin sensitivity and how they fit into daily routines. Guidance from Oakmed also notes that sprays are often preferred for broad application, while wipes can be easier for some users with dexterity limitations. Safe n’ Simple offers both approaches. This makes side-by-side comparison easier. Its product range includes an alcohol-free adhesive remover spray, alcohol-free wipes, and alcohol-based wipes designed for heavier residue. There is no universal winner. Many experienced ostomates use both formats together: Spray to help release the appliance edge and wipes to clean remaining adhesive from the skin. The right choice often depends less on the product itself and more on when and how it is being used. How Adhesive Remover Sprays Work Adhesive remover sprays work by delivering a fine mist directly along the edge of the adhesive barrier. The liquid penetrates beneath the appliance or dressing and helps break down the adhesive bond while the user gradually removes the product. A common technique described in ostomy guidance is a spray-peel-spray approach: spray the edge, peel a small section, spray again, and continue slowly. This creates a controlled release rather than pulling the appliance away all at once. Sprays also differ from wipes in how they interact with the skin: Safe n’ Simple’s Adhesive Remover Spray without Alcohol follows this approach. It is designed to be sprayed along the wafer edge. After a few seconds it facilitates gradual removal. The alcohol-free formula is designed to leave no oily residue and does not require rinsing. How Adhesive Remover Wipes Work Wipes use a different approach. The adhesive-removing solution is contained within a pre-saturated cloth applied directly to the skin and adhesive surface. The key difference is that wipes combine two actions: This can make wipes especially useful after an appliance has already been removed and adhesive remains on the skin. Safe n’ Simple includes two different wipe approaches: Peri-Stoma Cleanser & Adhesive Remover Wipes (alcohol-free) — designed as a dual-purpose wipe for cleansing skin and removing adhesive residue at the same time Adhesive Remover Wipes with Alcohol — formulated for stronger removal of heavier adhesive buildup or stubborn residue Wipes often provide more direct control over small areas and cleanup tasks. They are often easily portable and convenient for users. Spray vs Wipes — Head-to-Head Comparison This is where the adhesive remover spray versus wipes debate becomes more practical. Both remove adhesive effectively in the right scenario. But they do it differently and often suit different stages of appliance removal. Feature Spray Wipes Ease of application One-handed point-and-spray application. Helpful for hard-to-reach areas. Usually involves gripping and wiping directly. Wipes may feel easier for some users with dexterity limitations. Precision & coverage Targets adhesive edges and covers larger areas quickly. Better for spot-cleaning residue. Large wipes cover broader skin areas. Residue Alcohol-free sprays are designed to dry without oily residue. Alcohol-free wipes also leave skin ready for the next appliance. Alcohol-based versions require rinsing. Portability Compact bottle but still a liquid product and not easy to transport. Individual packets fit easily into bags or pockets. Hygiene No-touch application. Single-use format with a fresh wipe each time. Cost efficiency One bottle often provides many applications. Multiple wipes may be needed during one appliance change. Best use case Releasing the appliance edge during removal. Cleaning adhesive residue after removal. Which Format Is Right for You? The best option usually depends on routine, skin needs, and how appliances are changed. Choose a spray if: Safe n’ Simple’s Adhesive Remover Spray without Alcohol is ideal for this use case. Choose alcohol-free wipes if: Safe n’ Simple Peri-Stoma Cleanser & Adhesive Remover Wipes combine cleansing and residue removal for a simple and portable use case. Choose alcohol-based wipes if: Safe n’ Simple Adhesive Remover Wipes with Alcohol are intended for more difficult residue. Use a combination of both if: That combined approach is one of the most common routines shared by experienced ostomy users. Alcohol-Free vs Alcohol-Based — Does It Matter? The comparison is not only about remover spray versus wipes. The formula itself also changes how a product behaves. Here’s a simple comparison. Alcohol-free products: Alcohol-based products: Wound care recommendations and skin injury prevention guidance generally support alcohol-free products for routine use and vulnerable skin. Alcohol-based options still have a role when adhesive buildup becomes difficult to remove. Safe n’ Simple offers both approaches. Users can choose based on the situation rather than relying on one product for every use. Tips for Getting the Best Results Technique matters as much as product choice. Many wound care and ostomy recommendations support a low and slow removal method rather than pulling appliances away quickly. Helpful reminders and tips: Safe n’ Simple products also include HCPCS coding that may support reimbursement: Coverage can vary. Users should check individual insurance arrangements. When to Consult a Healthcare Professional Adhesive removers can improve comfort, but they do not solve every skin issue. Speak with a healthcare professional or WOC nurse if: Repeated leakage may indicate a fit issue rather than a problem with the remover itself. Always consult a healthcare professional if you are worried about any symptoms.
How to Control & Eliminate Ostomy Bag Odor

Controlling ostomy odor is a top priority for many people living with a stoma. Odor worries can affect confidence just as much as practical day-to-day care. In the Ostomy Life Study that took place in 2019, 62% of respondents said stoma-related concerns had caused them to avoid physical or social activities. See our companion guide: Why Does My Ostomy Bag Smell? if you want to understand the reasons odor develops in the first place. This article focuses on the next step. That means practical and actionable ways to control and reduce odor. There is no single product or technique that completely eliminates odor in every situation. Evidence and patient experience suggest that combining two or three strategies at the same time can make odor unnoticeable. The sections below move from simple everyday habits to more advanced solutions. You can start making changes immediately. Ensure a Proper Seal — The Foundation of Odor Control Odor control always starts with a secure pouch seal. Gas and output can escape an ill-fitting stoma. No deodorizer or filter will fully compensate for a poor seal. The WOCN Peristomal Skin Assessment guidance and ostomy care recommendations consistently place pouch fit at the center of preventing leakage and odor issues. Key areas to check: Science Insights identifies these as early signs of seal failure. A WOC nurse can assess the appliance and recommend adjustments if you have problems. Replace Worn-Out or Expired Equipment Modern ostomy pouches use multiple protective layers designed to contain odor and gas. Science Insights notes these systems rely on advanced barrier films, but materials gradually lose effectiveness over time. The American Nurse Journal – ostomy basics (2024) wear time guidance suggests the following replacement times: Replace earlier if leaks or skin changes appear. Waiting too long can weaken odor control and increase the chance of seal problems. Empty and Clean the Pouch Correctly Routine pouch care has a direct impact on odor control. WOCN and NHS discharge guidance commonly recommend emptying the pouch when it reaches around one-third to one-half full to avoid a noticeable colostomy bag smell. A pouch that becomes too full creates pressure on the seal and increases the chance of leakage. Simple habits make a difference: Dietary Adjustments to Reduce Odor Diet is one of the easiest areas to adjust because changes can be tested quickly. You do not need to remove every trigger food. The goal is to identify patterns and manage timing and portions. Foods commonly linked with stronger odor in studies from MedlinePlus and other organizations include: Some foods are commonly recommended to help reduce odor: Keeping a food diary for around two weeks can be a top tip to reduce ostomy odor. This often reveals personal triggers more effectively than avoiding large groups of foods unnecessarily. Stay Hydrated Hydration can help dilute output. This is particularly true for urostomy patients. More concentrated output may produce stronger odor. Aim for consistent fluid intake throughout the day rather than drinking large amounts all at once. Even small changes in hydration habits can noticeably improve odor control. Use Charcoal Filters to Neutralize Gas Odor Activated charcoal filters are built into many modern ostomy pouches and are also available as add-on products. They work by allowing gas to pass through a porous carbon layer that traps odor molecules on its surface. This process (adsorption) helps reduce smell while also releasing trapped gas. Charcoal filter options include: Filters can help: Filters do not last forever. The American Nurse Journal explains that moisture can reduce effectiveness. This is why many manufacturers recommend covering filters during bathing or swimming. If gas control becomes noticeably worse, the pouch or filter may need replacing. Pouch Deodorants: Drops, Sprays, and Gels In-pouch deodorants are designed to neutralize odor directly inside the appliance rather than simply masking it. Common options include: Avoid placing household perfumes or air fresheners inside the pouch. These products are designed for the air, not medical appliances, and may irritate skin or affect pouch materials. Essential Oils as a Complementary Option Some patients ask about essential oils for odor management. While a dedicated pouch deodorant remains the most reliable choice — formulated specifically for use with ostomy systems and tested for material compatibility — emerging research has examined essential oils as a complementary measure. One randomized controlled trial involving lavender oil reported improvements in perceived odor and quality-of-life measures among some ostomy patients (Yousef et al., 2024, European Journal of Oncology Nursing). Where they have been studied, very small amounts were used — typically 1–2 drops, or around 0.5 cc, introduced into the pouch at changes. Some studies suggest avoiding citrus oils, as they may degrade pouch materials. Essential oils are not suitable for everyone and are not a replacement for a proper pouch deodorant. If you’re considering them, discuss it with your stoma nurse or healthcare professional first to ensure they’re appropriate for your situation and compatible with your appliance. Internal (Oral) Deodorants Some odor-control methods work before output reaches the pouch. Internal deodorants are designed to reduce odor-producing compounds during digestion. One of the best-known options is bismuth subgallate (Devrom®): A double-blind study by Sparberg (1974) reported odor reduction in ileostomy patients. Later research continued examining its use in gastrointestinal surgery patients. Temporary darkening of stools or the tongue can occur but is generally harmless. Chlorophyll tablets are another option sometimes used by ostomates. Evidence supporting them is less established. Always speak with a healthcare provider before starting oral deodorants or supplements. Ostomy Pouch Covers and Wraps Pouch covers and wraps can provide an extra layer of odor management and comfort. Even with a functioning pouch system, heat and pressure from clothing may affect performance over time. Some covers offer: Research has explored odor-control fabrics containing materials such as carbon, zeolite, and antimicrobial components. These products may provide additional support, but they work best alongside proper pouch fit and routine care rather than as a replacement. When to Consult a Healthcare Professional Odor control products and routine adjustments
Why Does My Ostomy Bag Smell?

Odor is one of the biggest worries for people living with an ostomy. It can affect confidence through many areas of life: social plans, work, travel, and relationships. In the Ostomy Life Study 2019, 62% of participants said they had avoided physical or social activities because of their stoma. This article focuses on one question: why does my ostomy bag smell? It explains the main causes of odor from normal digestion to pouch leakage. There are also considerations around nutrition and equipment issues that might be the reason for unpleasant odors. The Biology of Ostomy Odor — What’s Actually Happening Stool and urine naturally contain waste products that produce odor. This is a normal part of digestion and metabolism. Bacteria in the digestive system break down food and release gases and chemical compounds. This includes sulfur-containing substances that create smells. Without an ostomy, these odors stay mostly contained inside the body until a bowel movement occurs. An ostomy changes that process by redirecting output into an external pouch. Waste and bacteria continue interacting within the pouch after leaving the body. Research using gas chromatography on ileostomy pouch gas has shown that much of the gas buildup inside a pouch develops after output enters the appliance. Bacteria continue fermenting digestive material inside the bag itself, producing gases and odor compounds over time. This is why odor can gradually increase even after a pouch has been emptied. The exact smell can vary depending on the type of ostomy among other factors. Studies have also shown that diet makes a big impact. Things like hydration and how long output remains inside the pouch also matter. Bacterial Breakdown of Waste Inside the Pouch Bacteria from the digestive tract continue breaking down waste after it enters the pouch. This process produces gases and sulfur compounds such as hydrogen sulfide and methyl mercaptan. These are responsible for strong odors. Even a newly emptied pouch can begin developing smell quickly because bacterial activity continues constantly. Heat from the body and longer wear times can accelerate this breakdown. Gas Production and Buildup (Ballooning) Gas naturally exits through the stoma throughout the day. That gas carries odor molecules with it. Many pouches use charcoal filters to vent gas and reduce smell. It is possible that filters can become blocked by moisture or output. When gas cannot escape properly, the pouch may inflate or “balloon.” This increases pressure on the appliance and raises the chance of odor leaking around the edges. Diet: Foods That Increase Odor Some foods naturally produce stronger-smelling output because they contain sulfur compounds or affect digestion. For colostomy patients, foods such as green vegetables, garlic, and onions are common triggers. Ileostomy patients often notice stronger odor after fish, eggs, cheese, and other sulfur-rich foods. In urostomy patients, asparagus, coffee, spices, and garlic can affect urine odor. Food-related odor is usually a normal digestive response and does not automatically mean there is a problem with the stoma. Pouch Leakage and Seal Failure Leakage is one of the most common reasons people notice ostomy odor outside the pouch. Even small gaps between the stoma and the skin barrier can allow gas or liquid output to escape. Causes include a poorly sized wafer opening as well as changes in body shape or weight. There can also be issues arising from oily or damp skin, worn-out products, or movement shifting the appliance during daily activity. In the Ostomy Life Study of 2019, 76% of respondents reported leakage under the baseplate at least once per month. This affects a huge proportion of ostomy patients. Infrequent Emptying or Changing of the Pouch The longer waste remains inside the pouch, the more time bacteria have to produce odor and gas. A pouch that becomes too full also places pressure on the seal. This can increase the risk of leakage. Clinical guidance commonly recommends emptying the pouch when it reaches around one-third to one-half full. Always follow the advice of your clinical team. Medications and Supplements Certain medications and supplements can change the properties of stoma output. This could mean a stronger smell but also a change in consistency or volume. Antibiotics may disrupt gut bacteria and lead to stronger-smelling or watery output. Iron supplements can darken stool and intensify odor. Probiotics and antacids may also alter digestive activity and change odor patterns in some patients. Even taking vitamins may alter the smell. Illness and Infection An unusually strong or unpleasant smell may sometimes signal a medical issue. Stoma infections can cause redness and pain. You may notice unusual discharge alongside odor changes. Gastrointestinal infections may produce watery and foul-smelling output. In ileostomy patients, partial bowel blockage can cause cramping and forceful liquid output with a strong odor. Persistent unexplained odor changes should be assessed by a healthcare professional. Worn-Out or Damaged Equipment Modern ostomy pouches are designed with multiple protective layers that help contain gas and odor. Pouch materials can still potentially wear down and become less effective at blocking odor molecules. Charcoal filters may stop working once saturated. Older adhesive barriers may lose their seal. Friction from clothing and long wear times can all contribute to equipment breakdown. Poor Peristomal Skin Hygiene Odor can also develop from waste residue left on the skin around the stoma during pouch changes. Oils or leftover adhesive near the stoma may interfere with barrier adhesion and increase the risk of leakage. Moisture trapped under the skin barrier can encourage bacterial growth and contribute to ongoing odor problems even when the pouch itself appears sealed properly. Does the Type of Ostomy Affect Smell? Yes. Different types of ostomies produce different kinds of output. This affects how odor develops. A colostomy usually produces more formed stool. Because waste spends longer in the large intestine, bacteria have more time to break it down. This often creates a more familiar stool odor and can also lead to increased gas production. An ileostomy produces more liquid output from the small intestine. Odor tends to be influenced more heavily by diet.